If you work with cables and terminals every day, your ratcheting crimper is one of those tools that can quietly make or break your job. A good crimper gives you repeatable, low‑resistance joints. A bad one gives you hot spots, loose connections, and mysterious downtime.
Have you ever finished a wiring job, only to find a terminal pulling off the wire during testing? That is usually not the wire’s fault. It is the crimp. And very often, it is the crimping tool.
In this guide, we will walk through what a ratcheting crimper is, how it works, main types, and how to choose the right model for your applications. Along the way, you will see examples from control panels, machinery, automotive wiring, and building installations, plus practical tips and common mistakes to avoid.
By the end, you will know exactly what to look for in a ratcheting crimper, and you will be ready to specify it in your next project—or send a quick inquiry to your preferred supplier.
What Is a Ratcheting Crimper and How Does It Work?
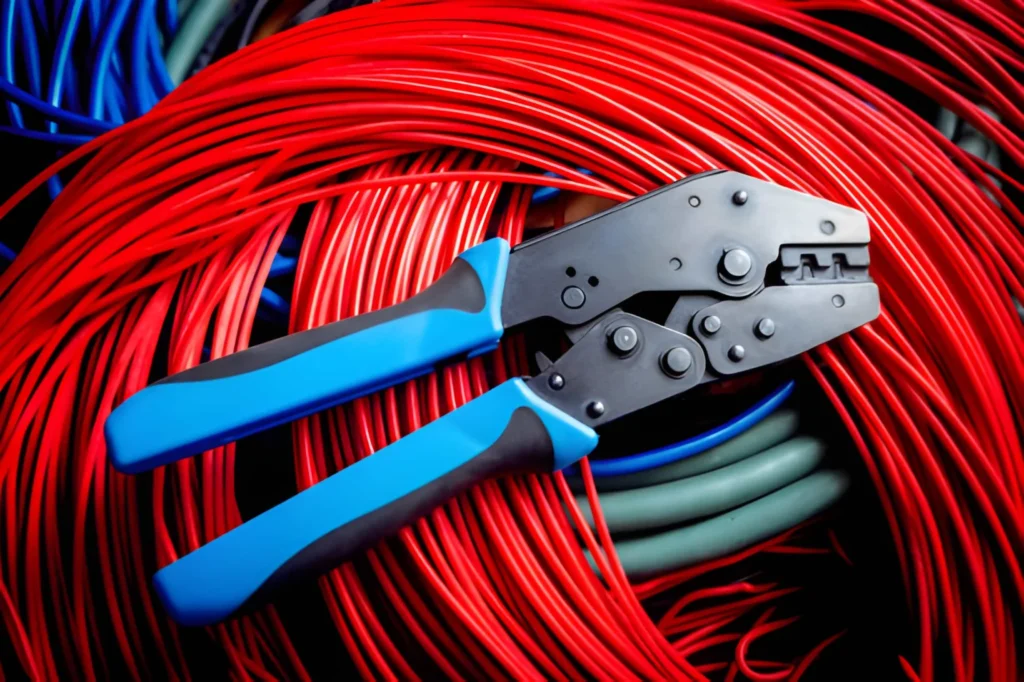
A ratcheting crimper is a hand or powered crimping tool with a built‑in ratchet mechanism that controls and completes the crimping cycle. Unlike simple plier‑type crimpers, a ratcheting wire crimper will not release the connector until the full crimp force is applied. This ensures consistent compression every time.
Inside the handles, a toothed ratchet engages when you squeeze. As you close the tool, the dies compress the terminal barrel onto the conductor in one or more profiles (for example, “W” crimp for cable lugs or “B” crimp for insulated terminals). The ratchet only releases after reaching a pre‑set pressure, so the operator cannot “under‑crimp” by stopping halfway.
From an engineering point of view, this matters for:
Contact resistance: A properly compressed terminal reduces micro‑movement and oxide layers, keeping resistance low in control panel terminals or automotive harnesses.
Mechanical strength: Pull‑out force needs to exceed specified values (often given in IEC, DIN, or OEM harness standards).
Repeatability: Maintenance technicians can expect the same crimp quality across hundreds or thousands of joints.
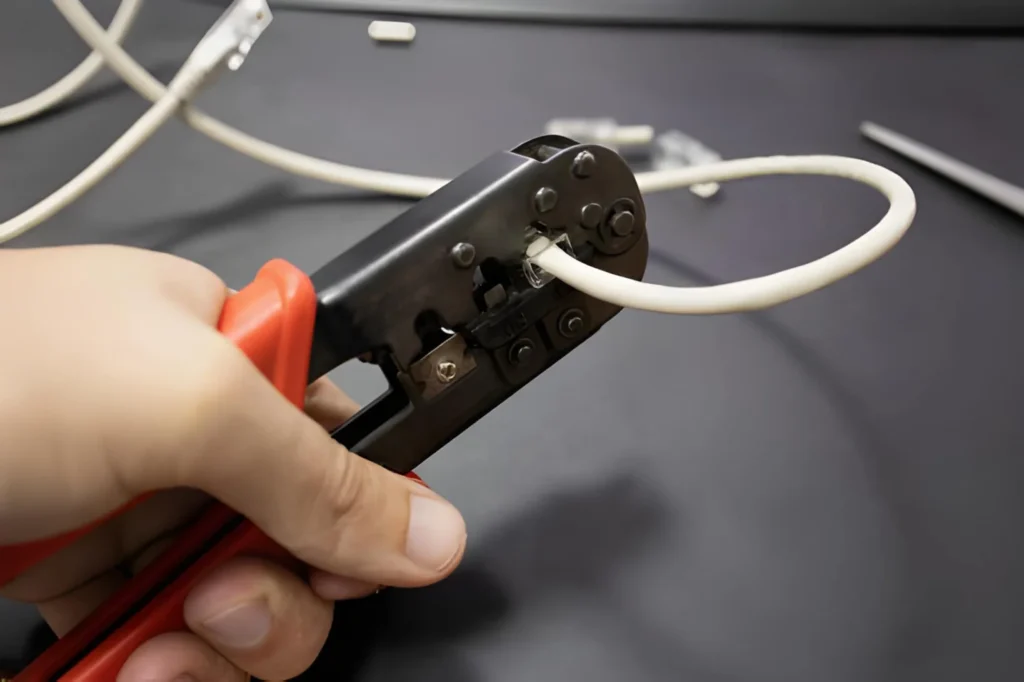
If you have ever wondered how to use a ratcheting crimper correctly: insert the stripped wire into the terminal barrel first, then place the terminal into the die, fully seat it, and only then squeeze the handles through the full stroke until the ratchet releases with a click. Partial strokes are not your friend here.
When a ratcheting crimper really shines
In control cabinets where you crimp hundreds of ferrules per day and need uniform results.
In machinery wiring, where vibration can loosen poorly crimped connections.
In automotive and off‑road vehicles, where temperature cycles and oil exposure punish weak crimps.
In building electrical installations, where compliance with local wiring codes and safety is non‑negotiable.
A ratcheting crimper for insulated terminals gives consistent compression without cutting into the plastic sleeve, which is hard to achieve with simple pliers.
Feature
Simple crimping pliers
Ratcheting crimper
Release before full crimp
Yes
No
Crimp force consistency
Operator‑dependent
Mechanism‑controlled
Suitable for high volume
Limited
Yes
Risk of under‑crimp
High
Low
Typical use
Occasional DIY
Professional / frequent use
Main Types of Ratcheting Crimper and Applications
Not all ratcheting crimpers are the same. If you choose only by price or color of the handles, you will probably regret it halfway through your first cable loom.
At a high level, ratcheting crimper vs crimping tools usually means comparing purpose‑built ratcheting models to generic, non‑ratcheting pliers. Within ratcheting tools themselves, there are several main categories.
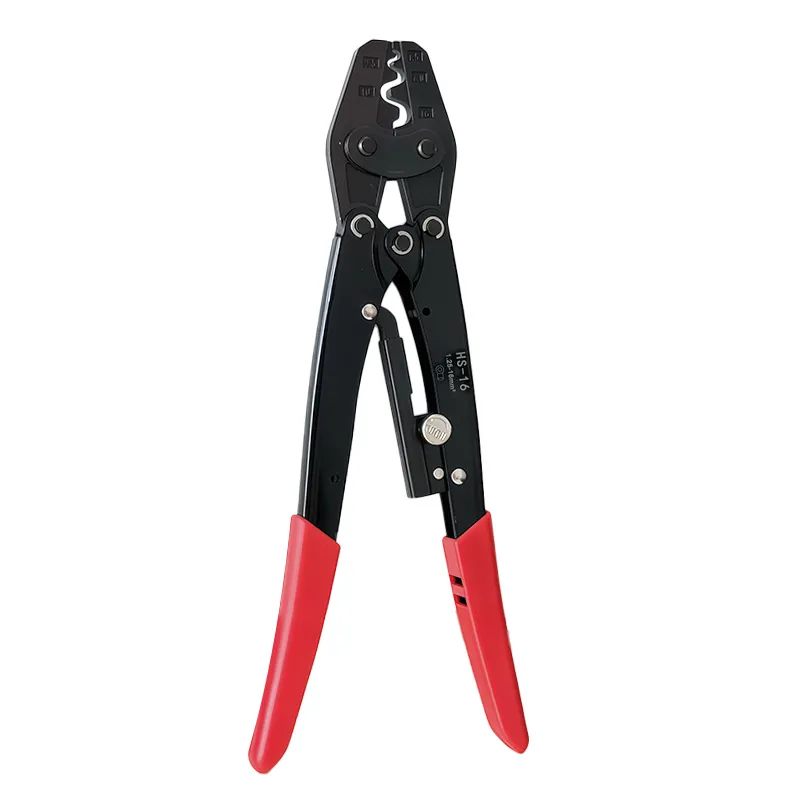
1. Ratcheting crimping pliers for cable lugs
These heavy‑duty tools are designed for non‑insulated copper or aluminum cable lugs and sleeves, usually from around 6 mm26\ \text{mm}^26 mm2 up to 120 mm2120\ \text{mm}^2120 mm2 or more. Many models use hexagonal, indent, or “W”‑shaped dies to meet utility and industrial standards.
Typical use cases:
Power distribution in industrial switchboards
Motor feeders and soft‑starter connections
Renewable energy systems, such as PV combiner boxes or battery systems
Look for ratchet crimping pliers for cable lugs that clearly indicate the cross‑section range on the head or dies, and match it to your cable sizes and lug specifications.
2. Ratcheting crimper for insulated terminals
These are the classic electrician’s tools for red/blue/yellow pre‑insulated terminals, often covering wire sizes from 0.5 mm20.5\ \text{mm}^20.5 mm2 to 6 mm26\ \text{mm}^26 mm2 (AWG 20–10). The die profiles are shaped to compress the metal barrel while supporting, but not damaging, the PVC or nylon sleeve.
You will see them everywhere:
Building wiring terminations in junction boxes
Machinery control circuits, relay and contactor connections
HVAC systems and small motors
Using the wrong crimper here is a recipe for crushed insulation, cut strands, or loose terminals that heat up under load.
3. Ferrule (end‑sleeve) ratcheting crimper
Ferrule crimpers are specialized ratcheting tools for wire end sleeves, typically used in control cabinets, PLC wiring, and terminal blocks. They commonly crimp square or hexagonal profiles from around 0.14 mm20.14\ \text{mm}^20.14 mm2 to 10 mm210\ \text{mm}^210 mm2, sometimes more.
Why they matter:
They compress fine‑strand conductors so they do not “splay” when tightened in screw‑clamp terminals.
They deliver uniform cross‑section, improving contact over time under vibration.
4. Modular and interchangeable‑die ratcheting crimpers
For maintenance teams and field service, a flexible ratcheting crimper with interchangeable dies can handle:
Insulated and non‑insulated terminals
Coax connectors, RJ45/RJ12 plugs
Solar MC4 terminals or special OEM contacts
These are ideal when you need one tool in a service vehicle, but check carefully that each die set is approved for your connector system.
Type
Typical wire range
Common applications
Ratcheting pliers for cable lugs
6–120 mm²
Power cables, motors, busbars
Crimper for insulated terminals
0.5–6 mm² (AWG 20–10)
Building wiring, machinery control circuits
Ferrule (end‑sleeve) ratchet crimper
0.14–10 mm²
Control panels, PLC I/O, terminal blocks
Interchangeable‑die ratchet crimper
Varies by die set
Field service, mixed connector types
If you are planning a new machine or panel project, this is usually the moment to talk with your supplier about which specific ratcheting crimper models fit your terminal brands and standards.
How To Choose the Right Ratcheting Crimper
So, how do you decide which ratcheting crimper to buy for your team? It is not only about “will it close the terminal”. For industrial or frequent use, a few parameters make the difference between a tool you trust and a tool that quietly ruins your QA statistics.
1. Match wire size and terminal type
Start with the basics: what conductor cross‑sections and terminal families will you crimp daily?
Wire size range: Check both metric mm2\text{mm}^2mm2 and AWG markings. A typical ratcheting wire crimper for insulated terminals covers AWG 22–10; heavy‑duty lug crimpers might start at AWG 8 or larger.
Terminal material: Copper, tinned copper, aluminum, or special alloys may require specific dies or crimp profiles.
Terminal type: Pre‑insulated rings, spades, push‑ons, cord end ferrules, cable lugs, butt splices, or special contacts.
If your crimper lists 0.5–6 mm² but your design includes 10 mm² motor leads, you already know the answer: you need an additional tool.
2. Check compatibility with connector/terminal standards
Many terminal and connector manufacturers test and certify specific crimping tools to meet pull‑out force, resistance, and safety criteria. For demanding applications—like automotive, rail, or industrial machinery shipped worldwide—this can be critical.
Ask questions such as:
Is the tool recommended or approved by the terminal manufacturer?
Does it comply with standards like IEC 60352 (crimped connections) or your local wiring code?
Does your quality system require “tool + terminal” validation records?
A generic ratcheting crimper might work mechanically, but for certified harnesses or exported control panels, “might” is not good enough.
3. Ergonomics and operator fatigue
If you or your team crimp all day long, handle design matters more than most buyers expect.
Consider:
Handle length and grip: Longer handles reduce required hand force, especially for larger cable sections. Soft, non‑slip grips reduce strain.
Required force: Many modern tools have optimized leverage, so even 10 mm210\ \text{mm}^210 mm2 ferrules are comfortable to crimp.
Tool weight: Lighter tools reduce fatigue in high‑volume production lines.
In a 500‑connection control cabinet, a comfortable ratcheting crimper for insulated terminals is not a luxury—it is a productivity tool.
4. Adjustability and calibration
Quality ratchet crimpers often include a force adjustment screw or wheel. This lets you fine‑tune the closing force to compensate for tool wear, terminal tolerances, or specific application needs.
Look for:
Clearly marked adjustment positions
Factory settings and instructions on how (and when) to adjust
Option for periodic calibration checks, especially in ISO‑controlled environments
For purchasing teams, asking your supplier about calibration procedures is a quick way to see whether the tool is designed for serious industrial use.
5. Environment and durability
Working in a clean panel‑building shop is not the same as working in an oily, dusty maintenance area.
Consider:
Surface treatment: Anti‑corrosion coatings protect the mechanism in humid or outdoor environments.
Joint design: Solid pivot pins and minimal play in the moving parts preserve crimp consistency.
Spare parts: Availability of replacement springs, ratchet components, or dies extends tool life.
If you maintain equipment in steel mills, wastewater plants, or offshore platforms, you already know what rough conditions can do to cheap tools.
Selection factor
What to check in specs or samples
Wire size / AWG range
Covers all planned conductors without forcing or “double crimping”
Terminal compatibility
Matches your terminal brand, type, and approvals
Ergonomics
Comfortable grip, reasonable hand force, suitable tool weight
Adjustability
Ratchet force adjustment and clear instructions
Durability
Robust construction, corrosion protection, spare part options
If you are planning a new project or updating workshop tools, you can always contact a technical sales team, share your wire and terminal list, and ask for a recommended ratcheting crimper configuration based on your standards.
Common Mistakes With Ratcheting Crimpers (And How To Avoid Them)
Even the best ratcheting crimper cannot fix poor practices. Many connection failures seen during commissioning or maintenance trace back to a few very avoidable mistakes.
Mistake 1: Mismatching wire gauge and die size
Using a die meant for 2.5 mm² on a 1.5 mm² wire looks “close enough” until you do a pull test or see heating in a loaded circuit.
How to avoid it:
Always match the color code or marking on the die (for example, red for 0.5–1.5 mm², blue for 1.5–2.5 mm², yellow for 4–6 mm²) with both the wire and the terminal.
For power cable lugs, make sure the printed size on the lug barrel matches the crimper die.
Mistake 2: Stripping too much or too little insulation
Too much bare conductor leaves exposed copper at the back of the terminal, inviting short circuits or corrosion. Too little stripped length leaves part of the barrel unfilled, reducing pull‑out strength.
Practical tip:
Follow the stripping length recommended by the terminal manufacturer, often given as a value in millimeters. Many harness drawings specify this explicitly for each connection.
Mistake 3: Not completing the ratchet cycle
Have you ever tried to “save time” by not fully closing the handles? On a ratcheting tool, this simply produces a weak, under‑compressed crimp.
Avoid it by:
Training all users that they must squeeze until the ratchet releases with an audible click.
Using tools without a “backdoor” release, except for emergency jam clearing.
This is where how to use ratcheting crimper training really pays off—especially with new technicians or DIY users upgrading from cheap pliers.
Mistake 4: Crimping through damaged or wrong insulation
Using a ratcheting crimper on a terminal whose insulation is already split, hardened, or not rated for your cable size leads to poor support and potential conductor exposure.
Instead:
Check that the insulation sleeve fully covers the stripped part plus a small section of jacket.
For ratcheting crimper for insulated terminals, ensure the die profile supports the sleeve rather than cutting into it.
Mistake 5: Never inspecting or maintaining the tool
Over time, dirt, metal dust, and wear in the ratchet or pivot points change how the tool behaves. In production environments, this can slowly degrade crimp quality.
Simple preventive measures:
Clean the dies and moving parts regularly with a soft brush and light oil, avoiding excess lubricant.
Perform periodic sample crimps and pull tests, especially after tool drops or long intensive use.
Replace heavily worn or damaged tools instead of “making them work”.
Practical Tips for Installation, Operation, and Maintenance
Once you have selected the right ratcheting crimper, a few daily habits can keep your crimps—and your tool—reliable in real‑world conditions.
For control panels and machinery wiring
Plan your sequence: Group similar wire sizes and terminal types together so you are not constantly switching dies or tools. This speeds up cabinet production.
Keep conductors clean: Oil or anti‑corrosion sprays on bare copper interfere with the mechanical bond. Clean any contaminated wire ends before crimping.
Use ferrules in fine‑strand conductors: When connecting to terminal blocks with screw clamps, crimped ferrules improve clamping and reduce strand breakage under vibration.
For automotive and mobile equipment wiring
Choose terminals and a ratcheting wire crimper rated for the temperature, fluids, and vibration you expect in engine compartments or chassis looms.
Use adhesive‑lined heat‑shrink splices where moisture ingress is likely, and make sure your crimper is compatible with these thicker barrels.
Always support the wire near the terminal with cable ties or harness clips to avoid flexing directly at the crimp.
For building electrical installation
Follow local codes on conductor cross‑section and terminal types, especially in high‑current circuits and safety systems.
When using a ratcheting crimper for insulated terminals in junction boxes, check that the sleeve color coding matches the conductor size specified in your standards.
Perform sample pull tests during training or toolbox talks so new electricians can feel the difference between a good and bad crimp.
Tool care in industrial environments
Storage: Keep the tool in a dry toolbox or case, not loose on the workshop floor or in the bottom of an oily cart.
Temperature: Extreme cold can make plastic handles brittle and stiffen lubricants; let the tool reach normal room temperature before heavy use.
Identification: For larger teams, assign tools by ID or number. This makes it easier to track calibration schedules and replace tools at the right time.
Area
Practical tip
Control panels
Group similar crimps to reduce tool changes and improve workflow
Automotive
Use sealed terminals and correct dies for harsh environments
Building sites
Respect local codes on wire sizes and terminal types
Tool care
Clean and lightly oil joints; store dry; track calibration or replacement
Conclusion: Choose the Right Ratcheting Crimper and Protect Your Connections
A ratcheting crimper looks like a simple hand tool, but in reality it sits at the heart of your electrical reliability. Whether you wire control panels, assemble machinery harnesses, build automotive looms, or maintain building installations, the tool you choose directly affects contact resistance, mechanical strength, and long‑term safety.
By matching wire sizes, terminal types, and standards, and by paying attention to ergonomics, adjustability, and durability, you turn crimping into a controlled process instead of a guessing game. Combine the right tool with good practices—correct strip length, full ratchet cycles, regular tool care—and your connections will survive vibration, temperature cycles, and long hours of operation.
If you are planning a new project, upgrading your workshop tools, or just comparing ratcheting crimper vs crimping tools for your team, now is a great time to review your requirements and talk with a specialist supplier.
Here are a few short CTAs you can adapt:
Ready to upgrade your crimping tools? Contact our sales team today for a tailored ratcheting crimper recommendation.
Send us your wire and terminal list, and request a quick quote for the right ratcheting crimper for your application.
Need help choosing a ratcheting crimper for your next project? Reach out now and get technical support from our engineering team.
Suggested image alt texts for real application scenes:
“Electrician using a ratcheting crimper to terminate insulated ring terminals in an industrial control panel”
“Technician crimping cable lugs on motor power cables with ratchet crimping pliers in a factory workshop”
“Automotive wiring harness assembly with worker using ratcheting crimper on insulated terminals”
FAQ
What is the main advantage of a ratcheting crimper over simple crimping pliers?
The ratchet mechanism controls the crimping cycle and only releases after reaching a preset force. This means every crimp receives approximately the same compression, independent of operator strength. For industrial wiring, this improves pull‑out strength and reduces the risk of loose or overheated connections compared with basic pliers that can be stopped halfway.
Can one ratcheting crimper handle all my terminals and wire sizes?
In practice, no. A single ratcheting crimper can cover a defined range—say 0.5–6 mm² insulated terminals or 6–50 mm² cable lugs—but trying to use it outside its specified range leads to weak crimps or damaged terminals. For professional work, most shops keep at least one tool for small control wires and ferrules, and another for larger power cable lugs.
How often should ratcheting crimpers be calibrated or checked?
The interval depends on usage and quality requirements. In ISO‑certified production, tools are often checked every 6–12 months using sample crimps and pull tests. For maintenance teams, a good practice is to inspect tools visually every few months and run a quick pull test whenever you notice unusual feel or visible wear. When in doubt, consult the manufacturer’s recommendations.
Are ratcheting crimpers suitable for DIY users?
Yes, a ratcheting wire crimper can be an excellent upgrade for serious DIY hobbyists, especially for automotive projects, solar systems, or home workshops. It adds consistency and safety compared with cheap plier‑type tools. The key is to choose a model that matches your typical wire sizes and terminal types and to read the instructions on how to use ratcheting crimper correctly.
When you work with wires every day, one small mistake can cause a big problem. Loose joints, overheated cables, or a connection that fails right when the job is finished—no one wants that. That is exactly why electrical crimping pliers are such an important tool in any electrician’s kit. Used well, they give you strong, […]
If you want to join cables and connectors safely, you need to understand crimping first. Crimping joins connectors and cables by compressing metal parts together to create a secure, long-lasting electrical bond. In this guide, you will learn what crimping is and which type of crimping tools you need to get your job done. What […]
We use cookies to enhance your browsing experience, serve personalised ads or content, and analyse our traffic. By clicking "Accept All", you consent to our use of cookies.