Ever had a crimp pull apart just when you thought the job was done? That sinking feeling usually means one thing: the wrong tool, or the right tool used the wrong way. That is where a Ratchet Crimping Tool changes the game.
A Ratchet Crimping Tool gives you consistent, repeatable crimps with less effort and less guesswork. Whether you are wiring a control panel, repairing automotive harnesses, or crimping ferrules in bulk, this simple upgrade in your toolbox can dramatically improve the quality and reliability of your work.
In this guide, you will learn what a Ratchet Crimping Tool is, how it works, the different types available, and how to choose the best model for your application. Along the way, you will also pick up practical tips, common mistakes to avoid, and answers to popular questions people ask before they buy.
And if you are sourcing tools for your workshop, brand, or distribution business, keep reading—there are a few key points that can save you money and reduce defects. When you are ready, you can send an inquiry for bulk ratcheting crimping tool orders and get customized options for your market.
What is a Ratchet Crimping Tool?
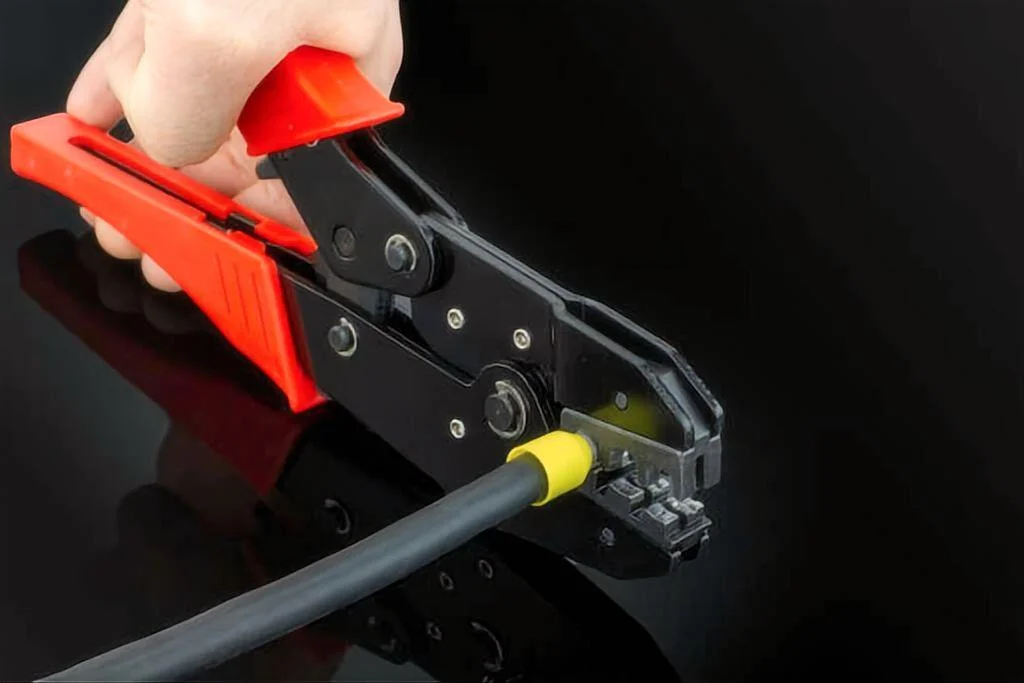
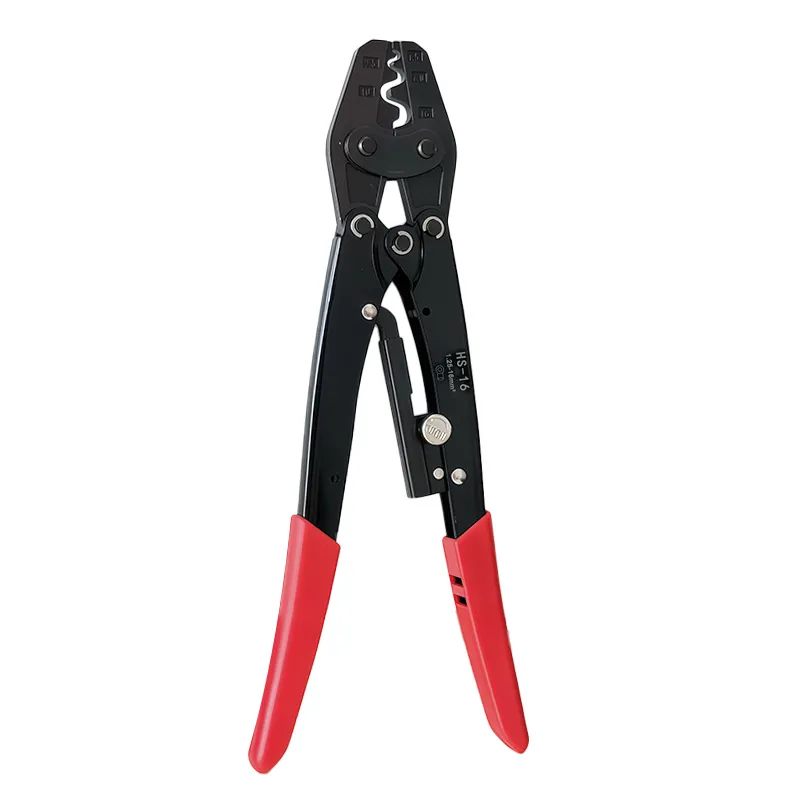
A Ratchet Crimping Toolis a hand tool used to join wires and terminals by compressing them together. Unlike basic plier-type crimpers, it uses a ratcheting mechanism that locks the handles in place until the crimp cycle is complete. This ensures that each crimp receives the correct pressure before the tool releases.
In plain language: you squeeze, the ratchet clicks, and the tool will not open until the crimp is fully formed. That means fewer weak crimps, fewer loose connectors, and fewer callbacks to fix bad joints.
Most Ratchet Crimping Tool designs share three key parts:
Ratcheting handle for controlled, progressive force
Interchangeable or fixed crimping dies for different terminals
Release lever in case you need to stop mid-crimp
Here is a quick overview of these parts and what they do:
Part
Function
Handles with ratchet
Apply and lock in force step by step
Crimping jaws/dies
Shape and compress the terminal onto the wire
Ratchet release lever
Allows manual release before the cycle is complete
Adjustment wheel/screw
Fine-tunes crimp pressure for different connectors
When combined, these features make the Ratchet Crimping Tool ideal for professional electrical work, automation panels, and high-volume production where consistent quality matters.
Why Use a Ratchet Crimping Tool Instead of Basic Crimpers?
You might be wondering, “Do I really need a Ratchet Crimping Tool? My regular crimper works… most of the time.” That “most of the time” is exactly the problem.
A basic crimper relies on your hand strength and judgment. If you squeeze too lightly, the crimp is weak. If you squeeze too hard, you may damage the terminal or wire. A ratcheting crimping tool removes much of this uncertainty.
Some key advantages:
Consistent pressure. The ratchet ensures the correct compression before it releases.
Improved connection strength. Crimps are more uniform, so pull-out force is higher.
Better productivity. You work faster, especially with repetitive jobs.
Less fatigue. The mechanical advantage means less effort per crimp.
To make it easier to see the difference, compare the two:
Feature
Basic Crimper
Ratchet Crimping Tool
Pressure control
Manual, inconsistent
Fixed and repeatable
Release before full crimp
Easy (often too early)
Not possible without release lever
Crimp quality
Depends on user
High and consistent
Ideal for production work
Not recommended
Highly recommended
User fatigue
Higher
Lower
If you work with electrical connectors, insulated terminals, or wire ferrules on a regular basis, upgrading to a Ratchet Crimping Tool is one of the simplest ways to improve your workmanship and reduce failures.
And if you sell tools or assemble wire harnesses for customers, a high-quality Ratchet Crimping Tool is not just a convenience—it is a selling point for your service and your brand.
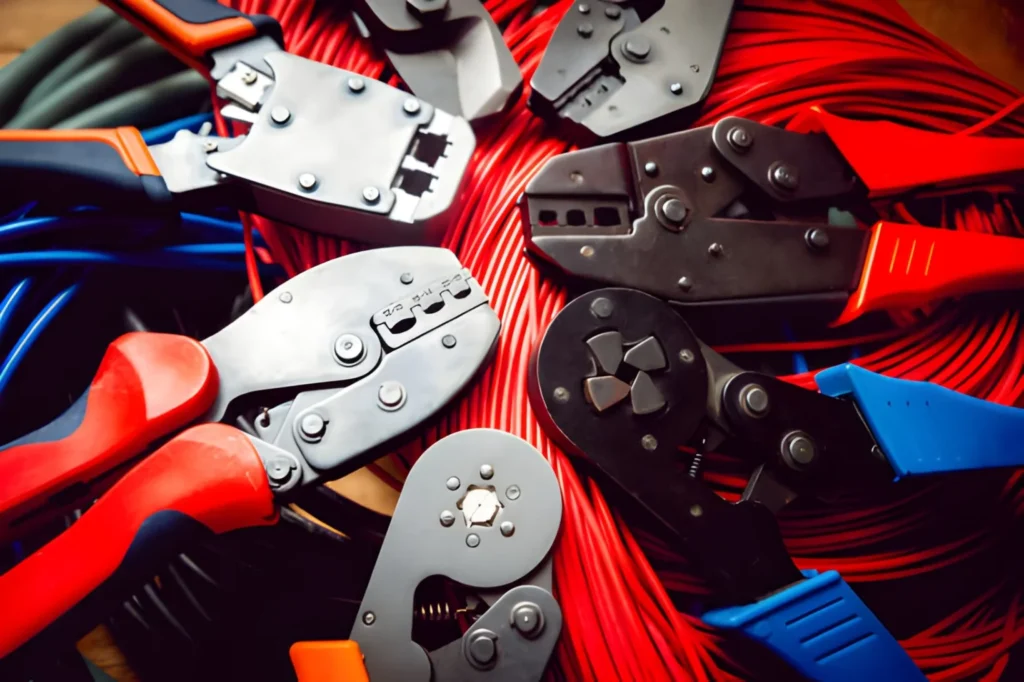
Types of ratcheting crimping tool and Their Applications
Not all ratchet crimpers are the same. Choosing the right type of Ratchet Crimping Tool depends on the connectors you use and the environment you work in.
Here are some common types you will see:
Insulated terminal ratchet crimper:Designed for red, blue, and yellow insulated terminals used in electrical panels and general wiring.
Non-insulated terminal ratchet crimper:Used for bare copper or tinned terminals, common in automotive and industrial applications.
Ferrule Ratchet Crimping Tool:Special jaws for crimping end sleeves on stranded wires, widely used in control cabinets and machinery.
Coaxial cable ratchet crimper:For RG-type coax connectors in data and communication systems.
Multi-functional ratchet crimper with interchangeable dies: One handle with several crimping dies for different terminals.
A quick reference table helps match tool types to typical uses:
Ratchet Crimping Tool Type
Typical Connector Type
Main Application Area
Insulated terminal ratchet crimper
Vinyl / nylon insulated terminals
Electrical panels, home wiring
Non-insulated ratchet crimper
Bare copper lugs, open-barrel
Automotive, marine, machinery
Ferrule Ratchet Crimping Tool
Wire ferrules (end sleeves)
Control cabinets, PLC wiring
Coax ratchet crimper
RG59, RG6, RG11 connectors
CCTV, networking, TV installation
Interchangeable-die ratchet tool
Mixed terminals and connectors
Workshops, service technicians
When you choose a ratcheting crimping tool, think about:
Wire size range you use most (for example, 0.25–10 mm20.25–10 mm2).
Whether you need square, hex, or trapezoid crimp profiles for ferrules.
Industry standards or certifications (UL, CE, etc.) required by your customers.
If you are not sure which style of ratcheting crimping tool fits your market, you can always ask for technical recommendations and sample tools before you place a bulk order.
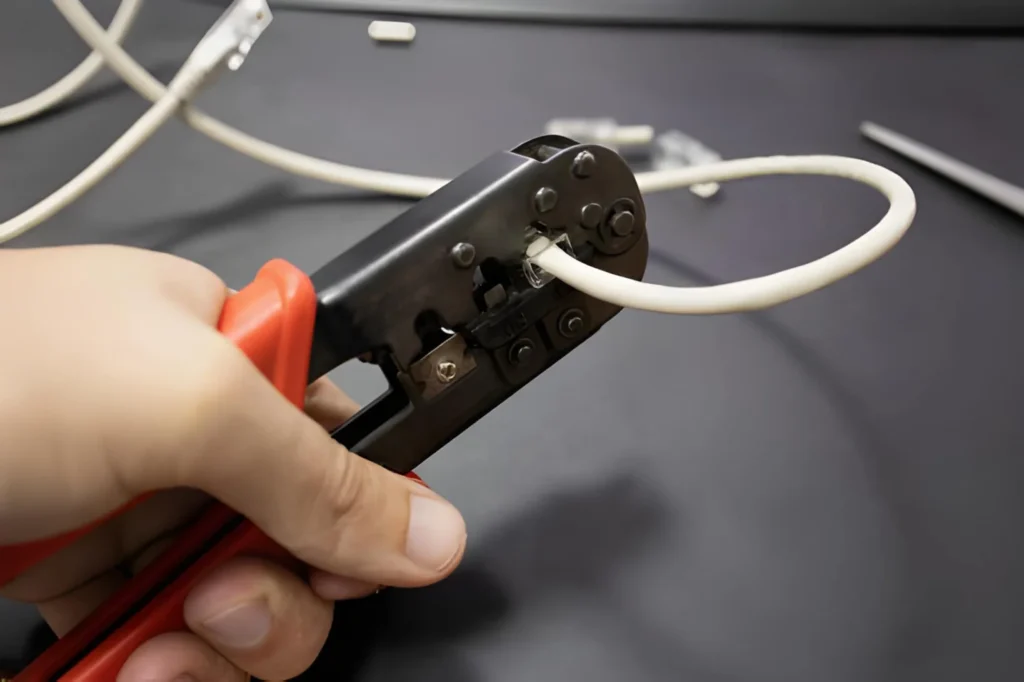
How to Use a ratcheting crimping tool Step by Step
A Ratchet Crimping Tool is simple to use, but a few small details make the difference between an average crimp and a perfect one. Here is a short step-by-step process you can follow and train your team with.
Strip the wire correctly. Remove just enough insulation so that the bare conductor fits the terminal barrel. Avoid nicking or cutting wire strands.
Select the right terminal or ferrule. Match the wire size and insulation color (for example, red for small wires, blue for medium, yellow for larger wires).
Insert the terminal into the ratcheting crimping tool. Open the handles, place the terminal into the correct die cavity, and lightly close the tool until it holds the terminal in place.
Insert the stripped wire. Push the wire fully into the barrel or ferrule so no bare copper remains exposed outside the terminal.
Squeeze the handles until the ratchet releases. You will feel and hear the ratchet clicking. Keep squeezing until the tool opens automatically. That means the crimp is complete.
Check the crimp. Perform a light pull test. If the wire does not move and the crimp looks neat and symmetrical, the Ratchet Crimping Tool has done its job.
A couple of quick tips:
Do not try to “half crimp” and then re-crimp; finish the cycle in one go.
If you choose a Ratchet Crimping Tool with an adjustable tension wheel, set it according to manufacturer instructions and your specific connectors.
Used this way, your Ratchet Crimping Tool will produce strong, vibration-resistant connections that last. That means fewer returns, fewer failures, and a more professional image for your work.
How to Choose the Right Ratchet Crimping Tool
With so many options available, how do you pick the best Ratchet Crimping Tool for your needs or for your customers? Here are practical factors to consider before buying or sourcing:
1. Application and connector type Start with your core application. Are you mainly crimping insulated terminals, ferrules, or automotive connectors? A Ratchet Crimping Tool optimized for that connector will always perform better than a “one-size-fits-all” tool.
2. Wire size range and crimp profile Check the wire section range and crimp shape. For example, a Ferrule Ratchet Crimping Tool might specify 0.25–6 mm20.25–6 mm2 with a square crimp, while another supports up to 16 mm216 mm2 with a hexagonal profile.
3. Build quality and materials Look for:
High-quality carbon steel or alloy steel jaws
Durable ratchet mechanism
Comfortable, non-slip handles
These details make a big difference if your team uses the Ratchet Crimping Tool all day.
4. Adjustability and calibration A good Ratchet Crimping Tool offers an adjustable ratchet force. This lets you fine-tune the tool for different terminal brands and ensures consistent compression over time.
5. Ergonomics and safety Curved handles, soft grips, and reasonable handle span reduce strain and fatigue. For operators doing hundreds of crimps per day, this is not a luxury—it is a necessity.
Here is a simple comparison of features to look for when you select a Ratchet Crimping Tool:
Selection Factor
Recommended Requirement
Application focus
Matches your primary connectors and wires
Wire size range
Covers at least 90% of your daily work
Crimp profile
Square / hex / open-barrel as your spec needs
Ratchet adjustability
Yes, with clear settings
Handle ergonomics
Non-slip, comfortable, moderate opening angle
Certification/standard
CE, RoHS, or other relevant approvals
If you are a buyer or distributor, you can request OEM branding, custom colors, and tailored packaging for your Ratchet Crimping Tool range. This helps you build a stronger product line under your own brand while keeping the technical advantages of a professional tool.
To discuss specifications, pricing, and bulk availability, you are welcome to send an inquiry with your required connector types, wire sizes, and order quantity.
Maintenance Tips to Extend Tool Life
A reliable Ratchet Crimping Tool can last for many years if you take good care of it. The better you treat the tool, the more consistent your crimps will remain over time.
Some simple maintenance habits:
Keep it clean. Wipe the jaws after use, especially if you work in dusty or oily environments.
Store it dry.Avoid leaving your Ratchet Crimping Tool in damp toolboxes or outdoors. Light rust can affect the ratchet and dies.
Lubricate the pivot points. A drop of light machine oil on moving joints and the ratchet mechanism keeps the action smooth.
Check calibration regularly. If crimps suddenly feel too tight or too loose, adjust the ratchet tension according to the manual.
These small steps protect your investment and ensure your Ratchet Crimping Tool delivers the same strong, dependable crimps from the first day to the last.
Conclusion: Make Every Crimp Count
In electrical and wiring work, your connection is only as strong as your weakest crimp. A Ratchet Crimping Tool gives you a simple, powerful advantage: consistent pressure, repeatable results, and reliable connections across every job.
You learned how a Ratchet Crimping Tool works, the main types available, and how to choose and use the right model for your needs. With the right tool in your hand—and the right training for your team—you can reduce failures, speed up production, and raise the overall quality of your wiring projects.
If you are ready to upgrade your toolkit or expand your product line, now is a great time to act. Share your wire size range, connector types, and estimated quantity, and send an inquiry for customized Ratchet Crimping Tool options that match your market and budget. Your next crimp can be cleaner, stronger, and more professional—starting today.
FAQ
What makes a Ratchet Crimping Tool better than a regular crimper?
A Ratchet Crimping Tool locks the handles until the crimp is fully formed, so you get consistent pressure every time. With regular crimpers, you might stop squeezing too early or apply uneven force. That leads to weak connections, which can fail under vibration or high current.
Can one Ratchet Crimping Tool work for all terminals and wire sizes?
Not exactly. Many Ratchet Crimping Tool models cover a wide range of sizes, but each tool still has limits. For example, one ferrule crimper might handle 0.25-mm²,while another covers 6–16mm²,For the best results, match the tool to the connectors you use most, or choose a handle with interchangeable dies for flexibility.
How do you adjust a Ratchet Crimping Tool?
Most tools have a small adjustment wheel or screw near the handle. Turning it changes the ratchet tension. If crimps are too loose, increase the pressure one step at a time and test. If the Ratchet Crimping Tool is crushing terminals, reduce the tension. Always check crimp quality after adjustments.
Is a Ratchet Crimping Tool suitable for ferrules and control panel wiring?
Yes. In fact, a dedicated Ferrule Ratchet Crimping Tool is standard in many control panel and automation workshops. It ensures that stranded wires are securely compressed inside ferrules, improving contact reliability in terminal blocks and PLC connections.
What is the best Ratchet Crimping Tool for automotive wiring?
For automotive work, look for a Ratchet Crimping Tool that supports non-insulated open-barrel terminals and standard insulated connectors used in vehicles. The tool should handle the common automotive wire sizes you use and provide strong crimps that resist vibration and heat.
How long does a Ratchet Crimping Tool last?
With normal use and basic care, a quality Ratchet Crimping Tool can last for many years. The main factors are build quality, frequency of use, and maintenance. Regular cleaning, occasional lubrication, and proper storage can significantly extend its service life.
Can I use a Ratchet Crimping Tool for professional work and production lines?
Absolutely. A Ratchet Crimping Tool is often the minimum standard for professional wiring, panel building, and assembly lines because of its consistent crimping performance. For higher-volume production, you might later upgrade to pneumatic or hydraulic systems, but a good Ratchet Crimping Tool is the perfect starting point.
JiaPaiMi Precision Ratcheting Crimper for Dupont 2.54mm Connectors When working with Dupont 2.54mm connectors, getting a solid, reliable crimp is crucial. The JiaPaiMi Precision Ratcheting Crimper is designed specifically for this purpose. Built to deliver consistent, professional-grade crimps on 2.54mm pitch terminals, it eliminates the common headaches of loose or weak connections in DIY electronics […]
Industrial electricians frequently encounter a frustrating problem: PLC control cabinets continue showing leakage currents even after careful installation. The culprit often isn’t the PLC modules themselves but inadequate ferrule terminal connections. When wire ends lack proper ferrule termination, loose strands create micro-arcing, oxidation, and gradual connection degradation that manifests as leakage current. Understanding PLC cabinet […]
Discover the key differences between dupont crimper and jst crimper tools plus expert tips for choosing the best crimper for reliable electronic connections
We use cookies to enhance your browsing experience, serve personalised ads or content, and analyse our traffic. By clicking "Accept All", you consent to our use of cookies.